
In Part One of How I Get Things Done, I talk a little bit about my process and how I use my Daily Worksheet. Today, I'll be going over all the other pages that make up The Essential Planner, a flexible agenda I designed to accommodate my evolving task management system.
Read MorePlanner

Workspace | How I Get Things Done | Part One
It's been a while since I've written a Workspace post and I'm really excited about this one. Today, I'm going over my task management system. At some point every year, I get overly confident and decide to start keeping track of my commitments in my head or on my phone. It works for a while, but then September rolls around and, inevitably, things start to fall through the cracks. Without fail, the end of the year is always so crazy and I end up going back to my paper planning system in order to keep up. I've adapted this system over the years and I decided to share it with you today because I'm really happy the current iteration.
Because my post was becoming quite lengthy, I've split it up into two parts. Today, I'm sharing a broad overview of how I use my planner, project notebook, daily worksheet, and phone to manage my time, keep track of projects, and remember important dates. In Part Two, I'll be giving you a closer look at everything with a video walkthrough,
Pictured above is my A5 planner made by Franklin Covey circa 2004. I've been tempted to update it, but I still find it to be pretty cute. Plus, it's in perfect condition because I don't carry it around with me. It's just too large to feel truly portable. Instead, it stays at home and I add dates to the calendar on my iPhone as necessary.
Basically, I think of my planner as the brain or central hub of my operations. It's where I store reference information and notes. And, it's also where I set goals and plan my schedule.
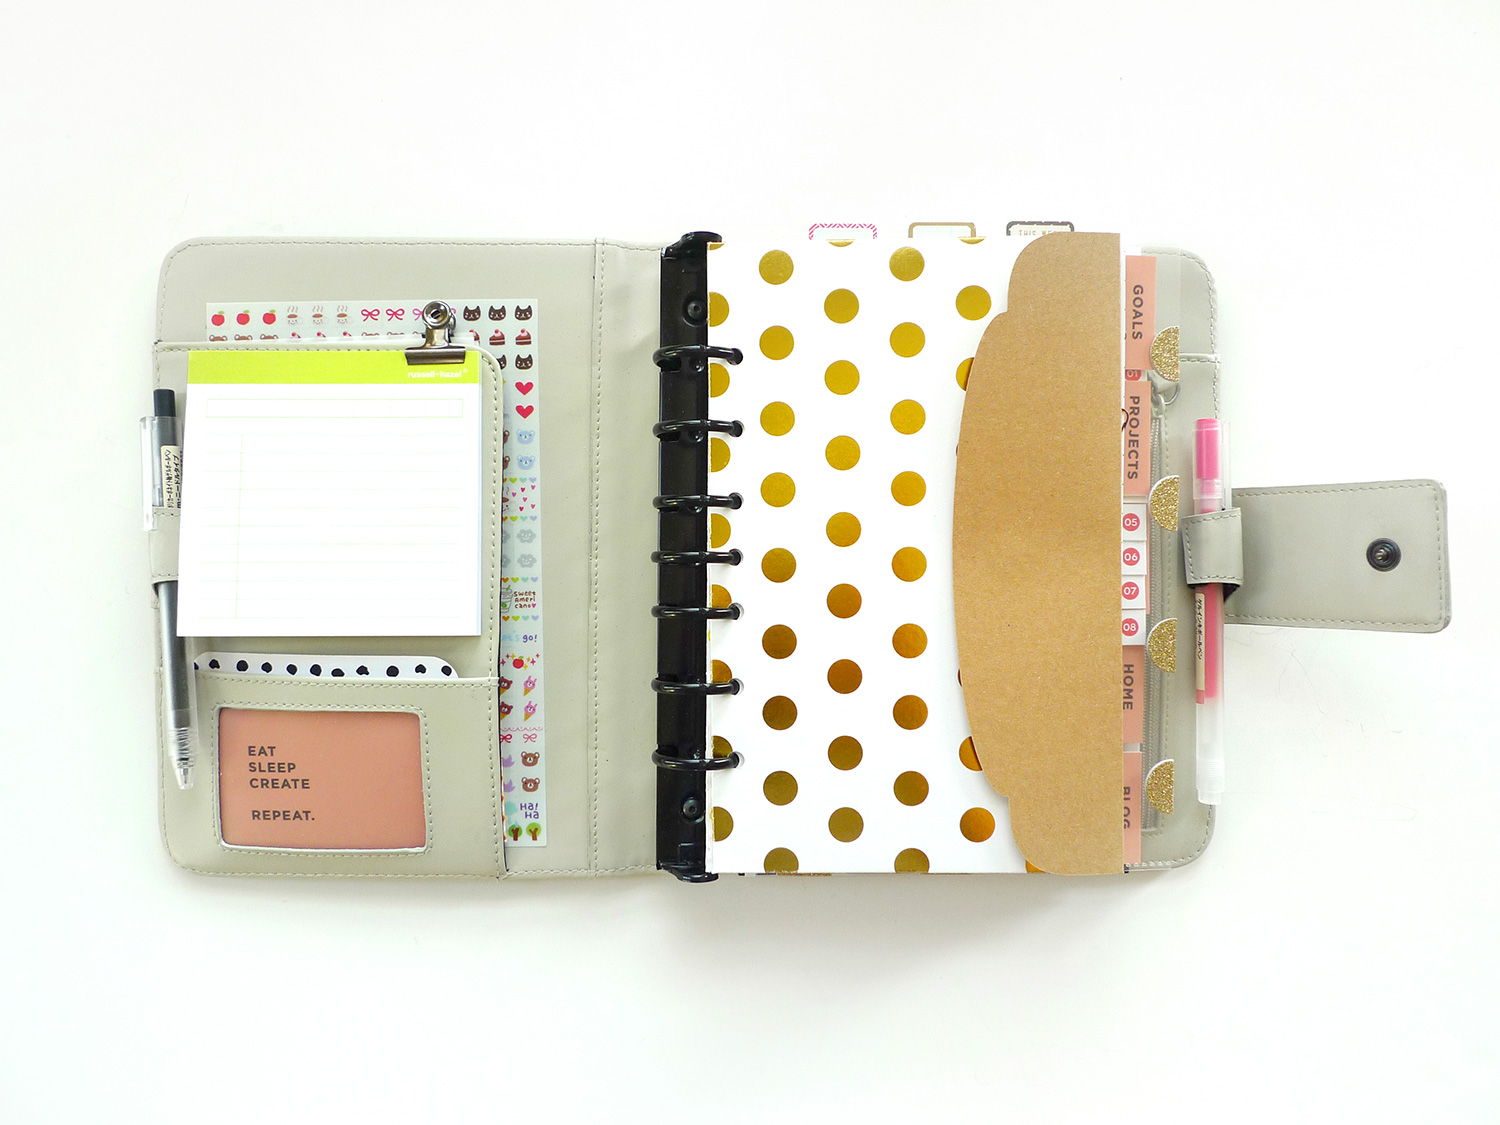
Inside, I have five main sections:
- Goals - Any tools I use for Goal Setting + Yearly, Monthly, and Weekly pages
- Projects - Any projects away from the computer. For example, those numbered tabs you see peeking out are part of the SC Workspace course.
- Work - Reference information and notes for anything work or finance related.
- Home - Reference information and notes for anything related to my household.
- Blog - Reference information and notes for anything related to my blog, and now, my shop. Note: I will be replacing this tab with "AP" to denote all things Analog Paper.
I only have one official calendar. All of my work, personal, and Analog Paper commitments are in one place, otherwise I can't properly manage my time. It's also important to me that my Monthly Calendar is always in view, so I had to designed my own to suite my needs. I always have my Weekly page on the right and the current month's Calendar on the left to reference.
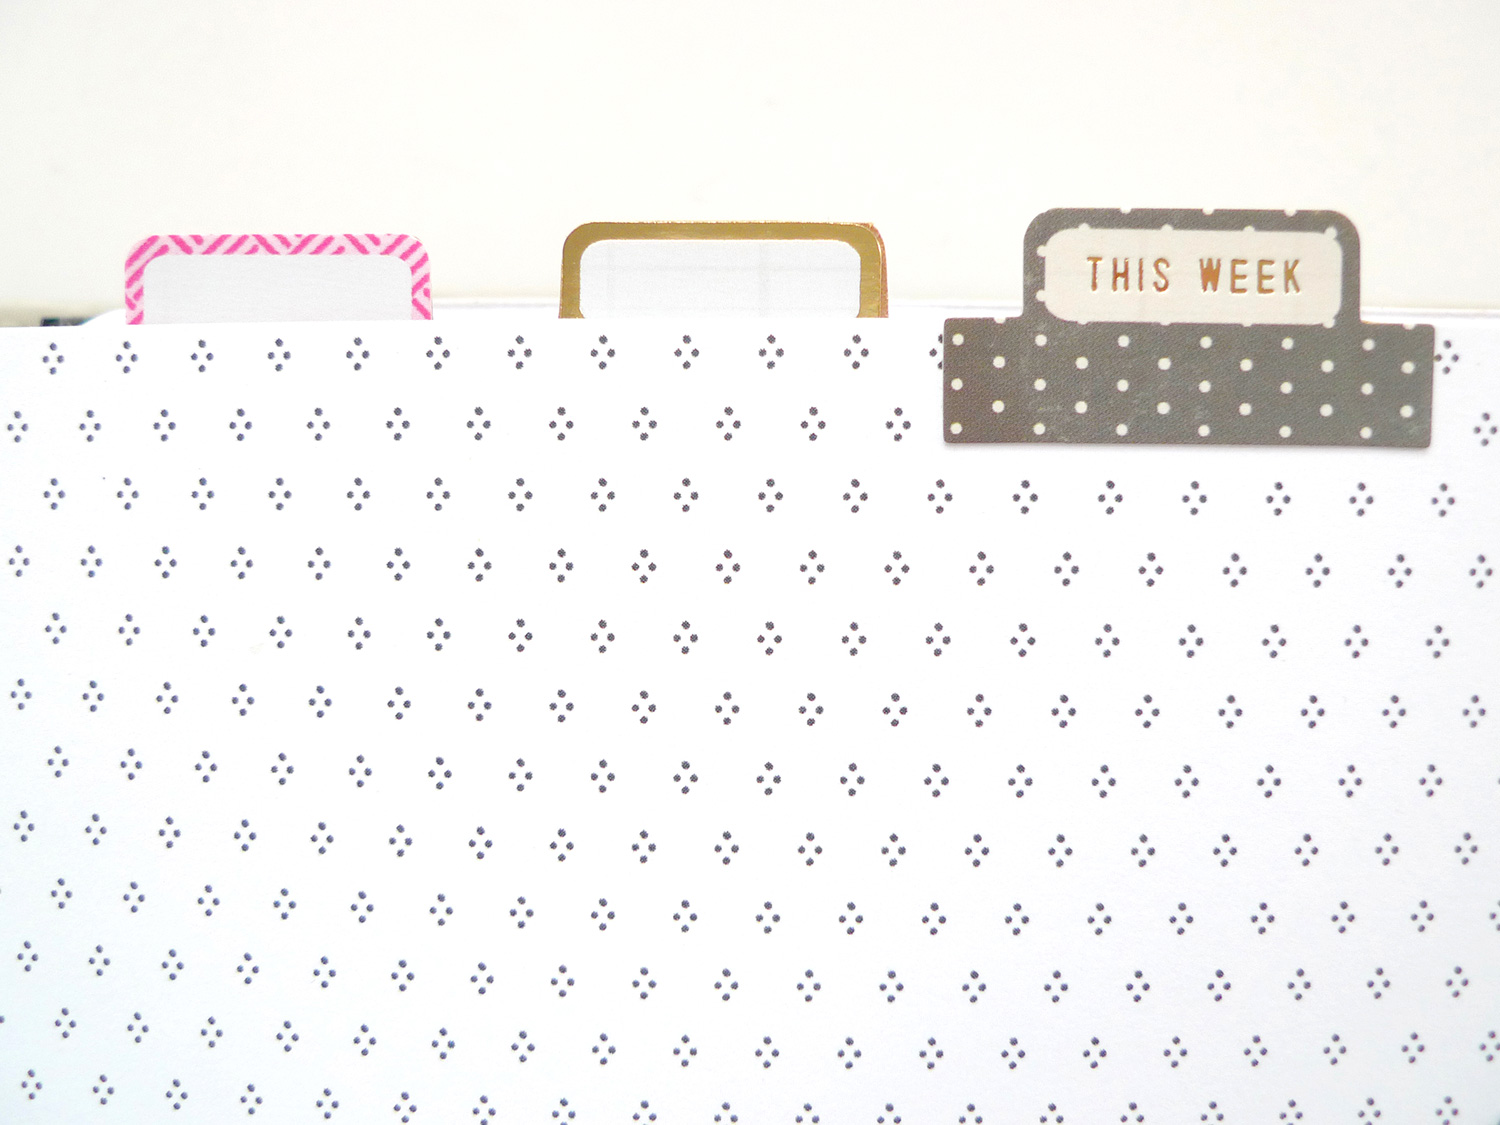
In order to quickly find my current month and week, I created the top facing tab you see above. The two other tabs are blank and change according to my current priorities. In practice, they move around from section to section depending on what I need to reference most at any given time. As a side note, I really LOVE making dividers for my planner. I just can't resist adding pretty paper to the mix.

For all the work I do on the computer, I use a disc bound notebook to organize my Project Tracking sheets. I made these to match the rest of my planning pages. They're geared toward client based work, but I use them for any project I'm working on, like a long blog post or a new product for the shop. There's a section for deliverables and another for specific tasks that extends to the back of the page.
And last, but certainly not least, is my Daily Worksheet you see below. This is the planning page that started it all. I had a hard time finding a Daily Worksheet that was detailed yet flexible enough to adapt to my system, so created this one. And then, of course, I simply had to design coordinating calendars, lists, and tracking sheets.

So here is how I use my Daily Worksheet:
- Week - a box to write in the week number; really handy when I was still organizing my Project Life album by weeks.
- Date - a space to circle the day of the week and write in the date.
- Tasks - a list of reserved for the priority tasks that MUST get done that day.
- Backburner - a space to jot down ideas for the future.
- Notes - a space to jot down new reference information.
- Schedule - a timeline of my day broken down into half hour increments; includes appointments, chores/errand, and project items that need to be completed.
- Habits - perhaps my favorite section and deserving of a more detailed description below...
A visual checklist of recurring tasks, or habits that I want to form. These will change as I grow and develop, so I needed it to be fluid and adaptive. The top section tracks water consumption and below are AM + PM symbols denoting recurring tasks I need to complete at the beginning and end of each day. Next to that that are a series of icons for various habits I am currently trying to cultivate.
For example, over the summer, I wanted to start posting to Instagram daily. I assigned this behavior to the speech bubble and would cross it out whenever I remembered to post something. After while, it became a habit and I no longer needed a visual cue on my Daily Worksheet to remind me to do it. Now, the speech bubble reminds me to check my blog comments and respond to questions every night..I'm still working on this one!
So that's a basic overview of my task management system. In Part Two, I'll be sharing a video walkthrough of everything (including my Time Tracker and, Project Index, and Task List). I know this system has really helped me and it's my goal that it will help others as well.
On Monday, October 13th, all of my planning pages will be available in my shop as an instant download. I'll also be sharing my video walk through, right here on the blog!
Thanks for stopping by and reading a little more about my process! I'd love hear your thought and answer any questions you may have! I'll be sure address everything in my post on Monday :)

Workspace | Planner Love | 001
Did you happen to snag one of the Gossamer Blue September kits before they sold out? Man, I got a lot of mileage out of them and even managed to make a set of planner inserts. I love customizing my planner and below are some images of dividers I made with the pretty paper. I also managed to squeeze out a couple of side-loading envelopes as well!


Clipped to the sides of the dividers are some eye candy...tags and typography with motivational phrases because we all need a high-five throughout the day.


And last, but not least, is my favorite insert…a glittery polka dotted plastic sleeve, perfect for holding receipts and what not.
Thanks for stopping by and feel free to drop me a line if you have any questions!
xx M